 |
| Home Grown produce! |
Wednesday, 26 November 2014
NEW WEBSITE coming soon.............
The Simple Green Kitchen is about to launch its new website! Watch this space for further info and please spread the word!
Wednesday, 6 August 2014
The Simple Green Kitchen launch!
Here's The Simple Green Kitchen launch at Prestatyn Flower Show.
This is the stall I set up for my talk. I also took some goodies along including lavender biscuits, parsley crackers and my energy bars. I even took small chunks of homemade herb Focaccia bread. All of which went down very well with the punters!
I've also been asked to give a talk to another group too!
A good day was had by all and I really enjoyed it. Thank you to everyone who came along!
A for LifeStyle: Vegan Up! Healthy Gourmet Food that Can Save Your ...
A for LifeStyle: Vegan Up! Healthy Gourmet Food that Can Save Your ...: What makes a man who was brought up in a typical French omnivore household eating creamy cheeses and fancy meats, who grew up...
Tuesday, 5 August 2014
Plant Sterols
 |
| Pam's Super Healthy Sprout Salad |
But did you know that plant sterols are found in ordinary everyday foods too?
We need approx 2.5g of these wonder sterols a day (which obviously consuming said margarine, yoghurts etc will aid).But here's a few (useful) surprises for you!
This is approximate and in mg per 100g fresh produce;
Brown rice - 87
Peas (dried)- 135
Beans (dried) - 127
Almonds - 138
Walnuts - 108
Pistachios - 108
Beetroot - 25
Broccoli - 37
Parsley - 28
Fresh garden peas - 30
Alfalfa sprouts - 20
Apple - 18
Blueberries - 26
Raspberries - 27
Green grapes - 20
Orange - 23
Rice bran oil - 1055
Flax seed oil - 338
Olive oil - 176
Coconut oil - 91
(Source: V Piironen, et al; 'Plant Sterols in vegetables, fruit and berries' Journal of the Science of Food and Agriculture, 2003; 83/4; 330-337)
Soya products are amongst the best sources and just 50 grams of tofu
gives you your daily target of 2.5g!
Wednesday, 14 May 2014
Extra tips for growing sprouts (and micros)
Following on from the previous two 'lessons' on sprouts and microgreens, I thought I'd add some extra help with sprouting etc so here we go....
I know I've said it before but buy the best quality seed you can afford - it'll last you ages and it's helping to support people who think like you!
When growing the bigger sprouts onto micros use deeper compost to give them the extra nutrition. I grow my pea shoots in troughs (the type you get for bedding plants!) or you could use plant pots. A 5" plant pot should give you a good crop. Spinach is best grown this way as the seed hulls can be a devil to get rid of without damaging the plants. Let them grow to the stage where the hulls are naturally shed to make life easier! Use spinach as baby leaf salad material.
- Pea shoots

For the cut and come again approach, where you cut is important! Cut too low and you'll kill them off. You need to leave at least 1-2 inches of plant (look for the crown and avoid cutting into that).
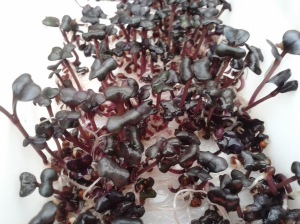
If growing baby salad leaves - feed them with a very dilute seaweed extract feed after cutting - they'll bounce back. You can, with care, get three to four cuts. *This isn't possible with beets and similar but will work for peas, rocket, mustard and sunflowers. You need to leave a crown for them to grow back from. The picture below shows beetroot micros which are only suitable for a single cut. Cut these very low to make the most of that gloriously coloured stem :-)

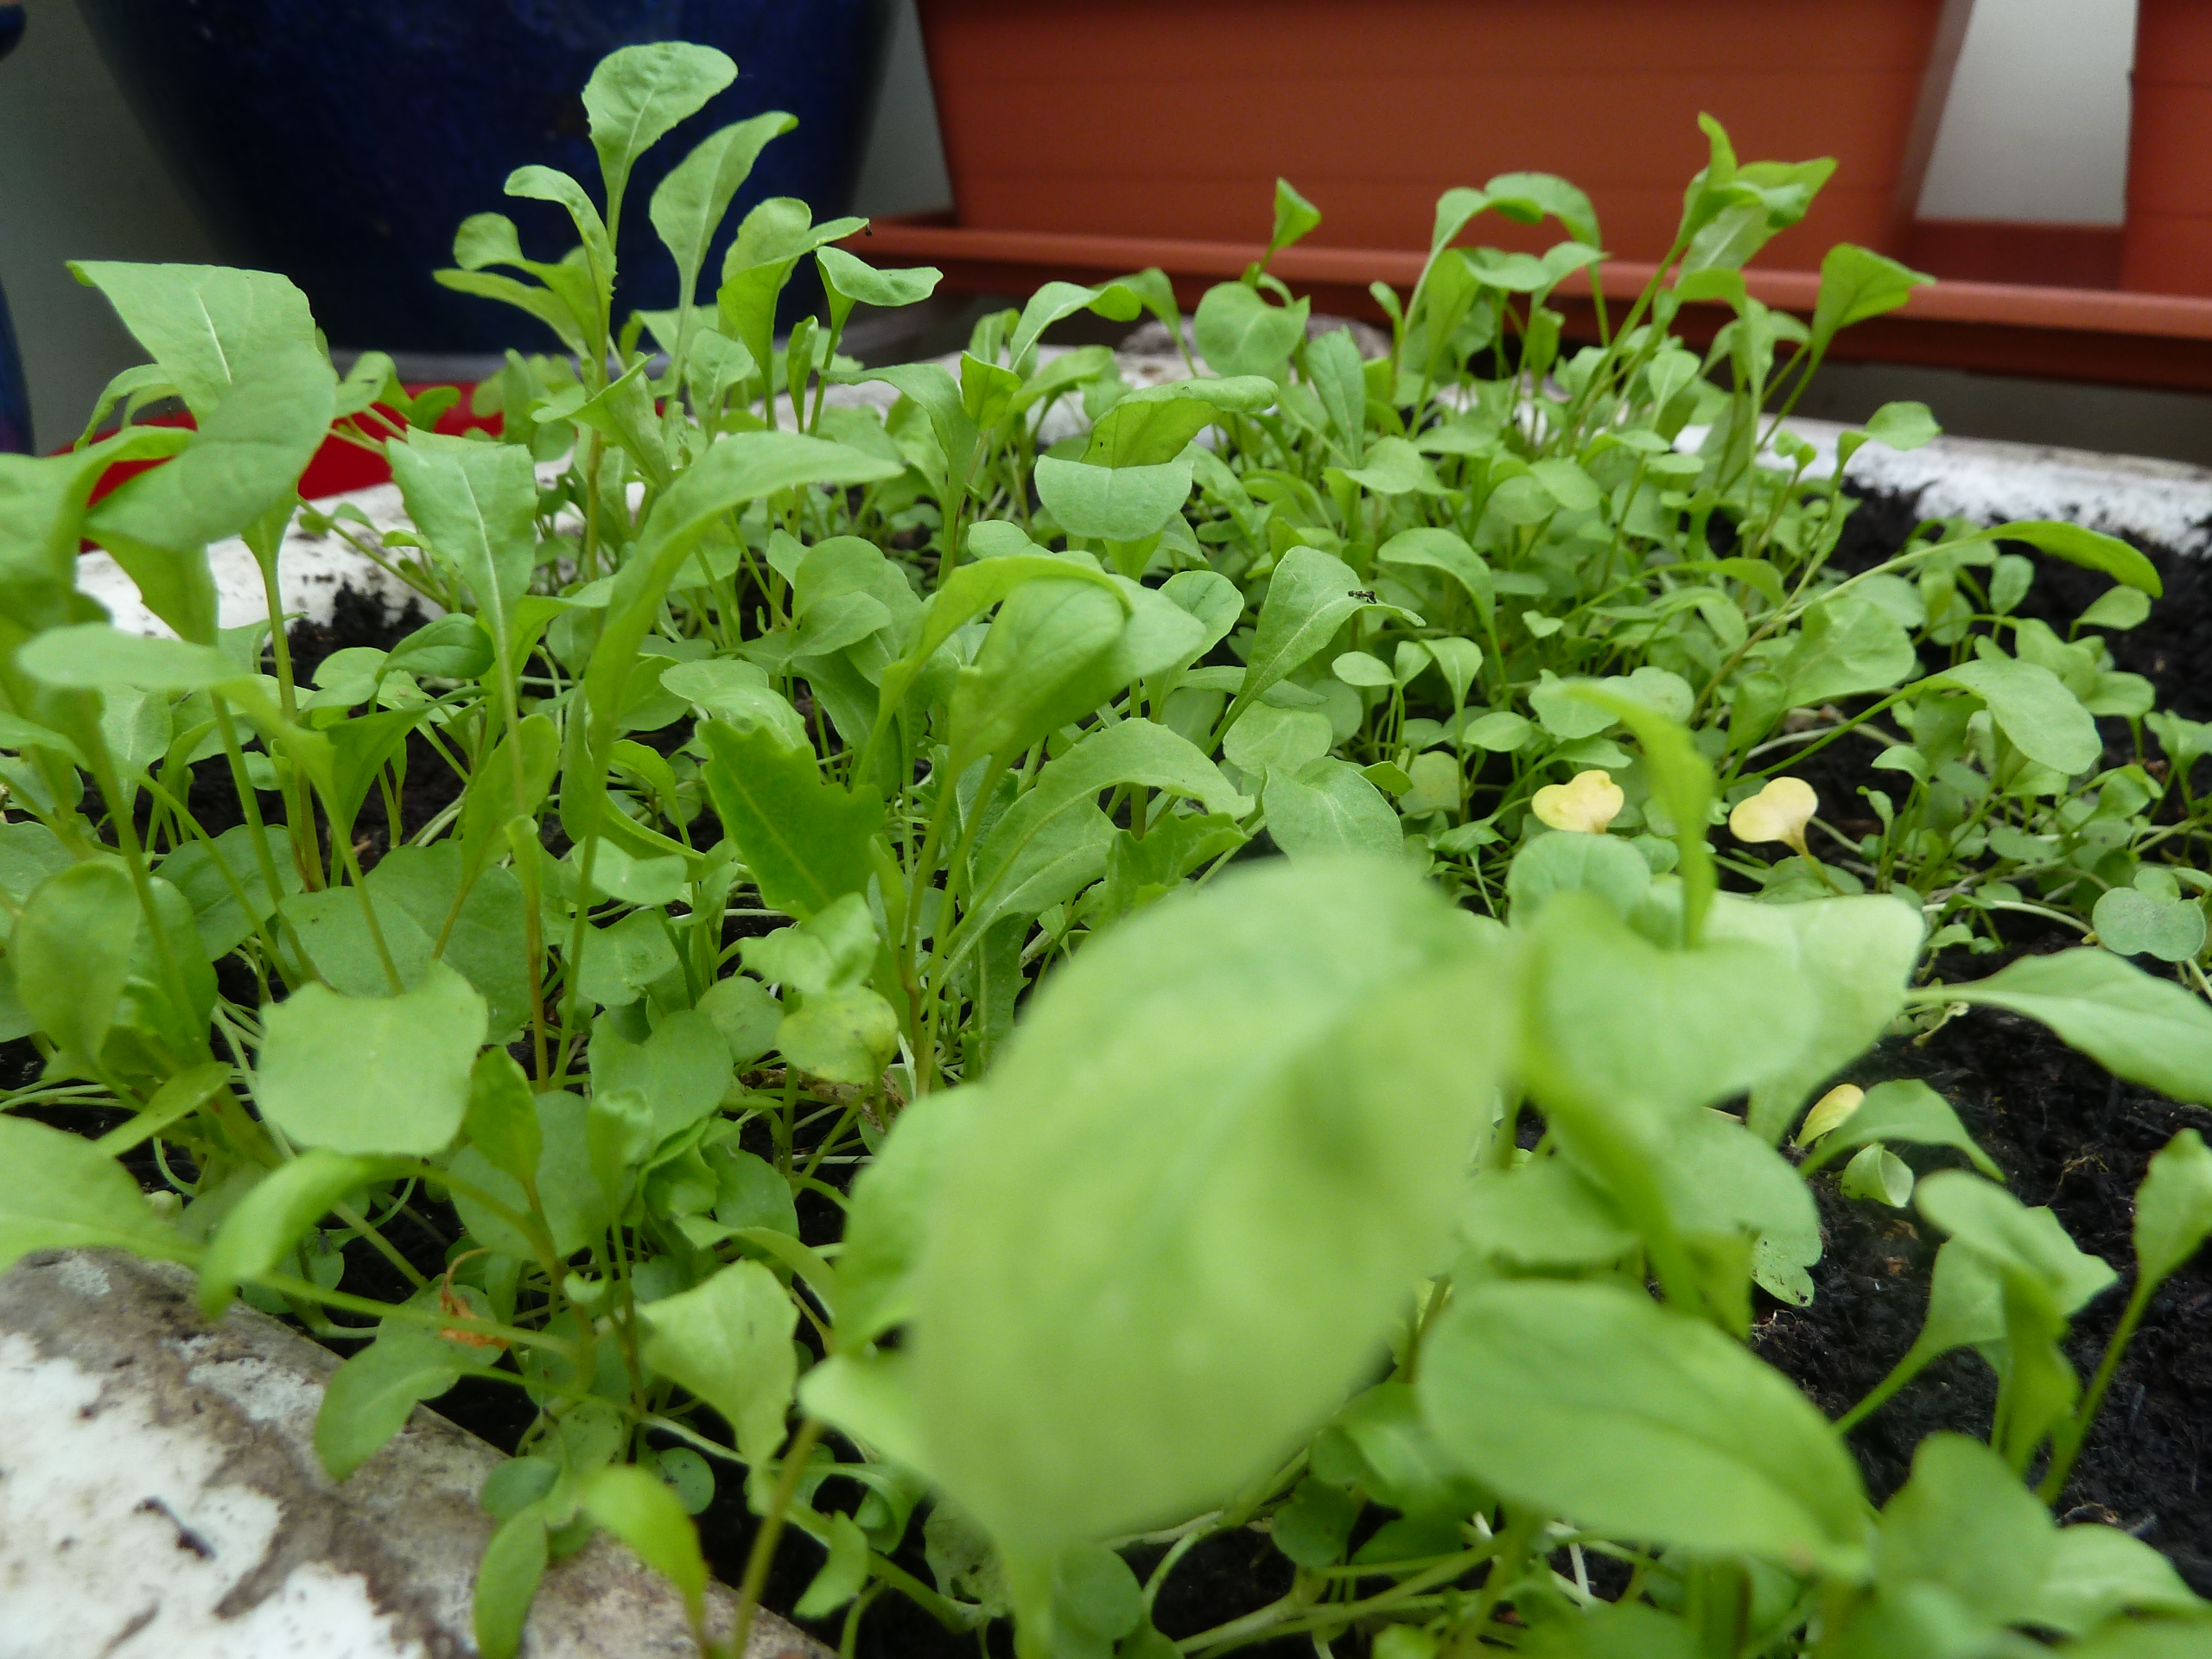
For baby salad leaves buy or make your own mix of fast growing leaves like rocket, lettuce, mizuna and mibuna. Throw in a few red mustard seeds and you'll have a lovely spicy mix :-) Grow in pots or troughs and keep well watered. You can still do this indoors.
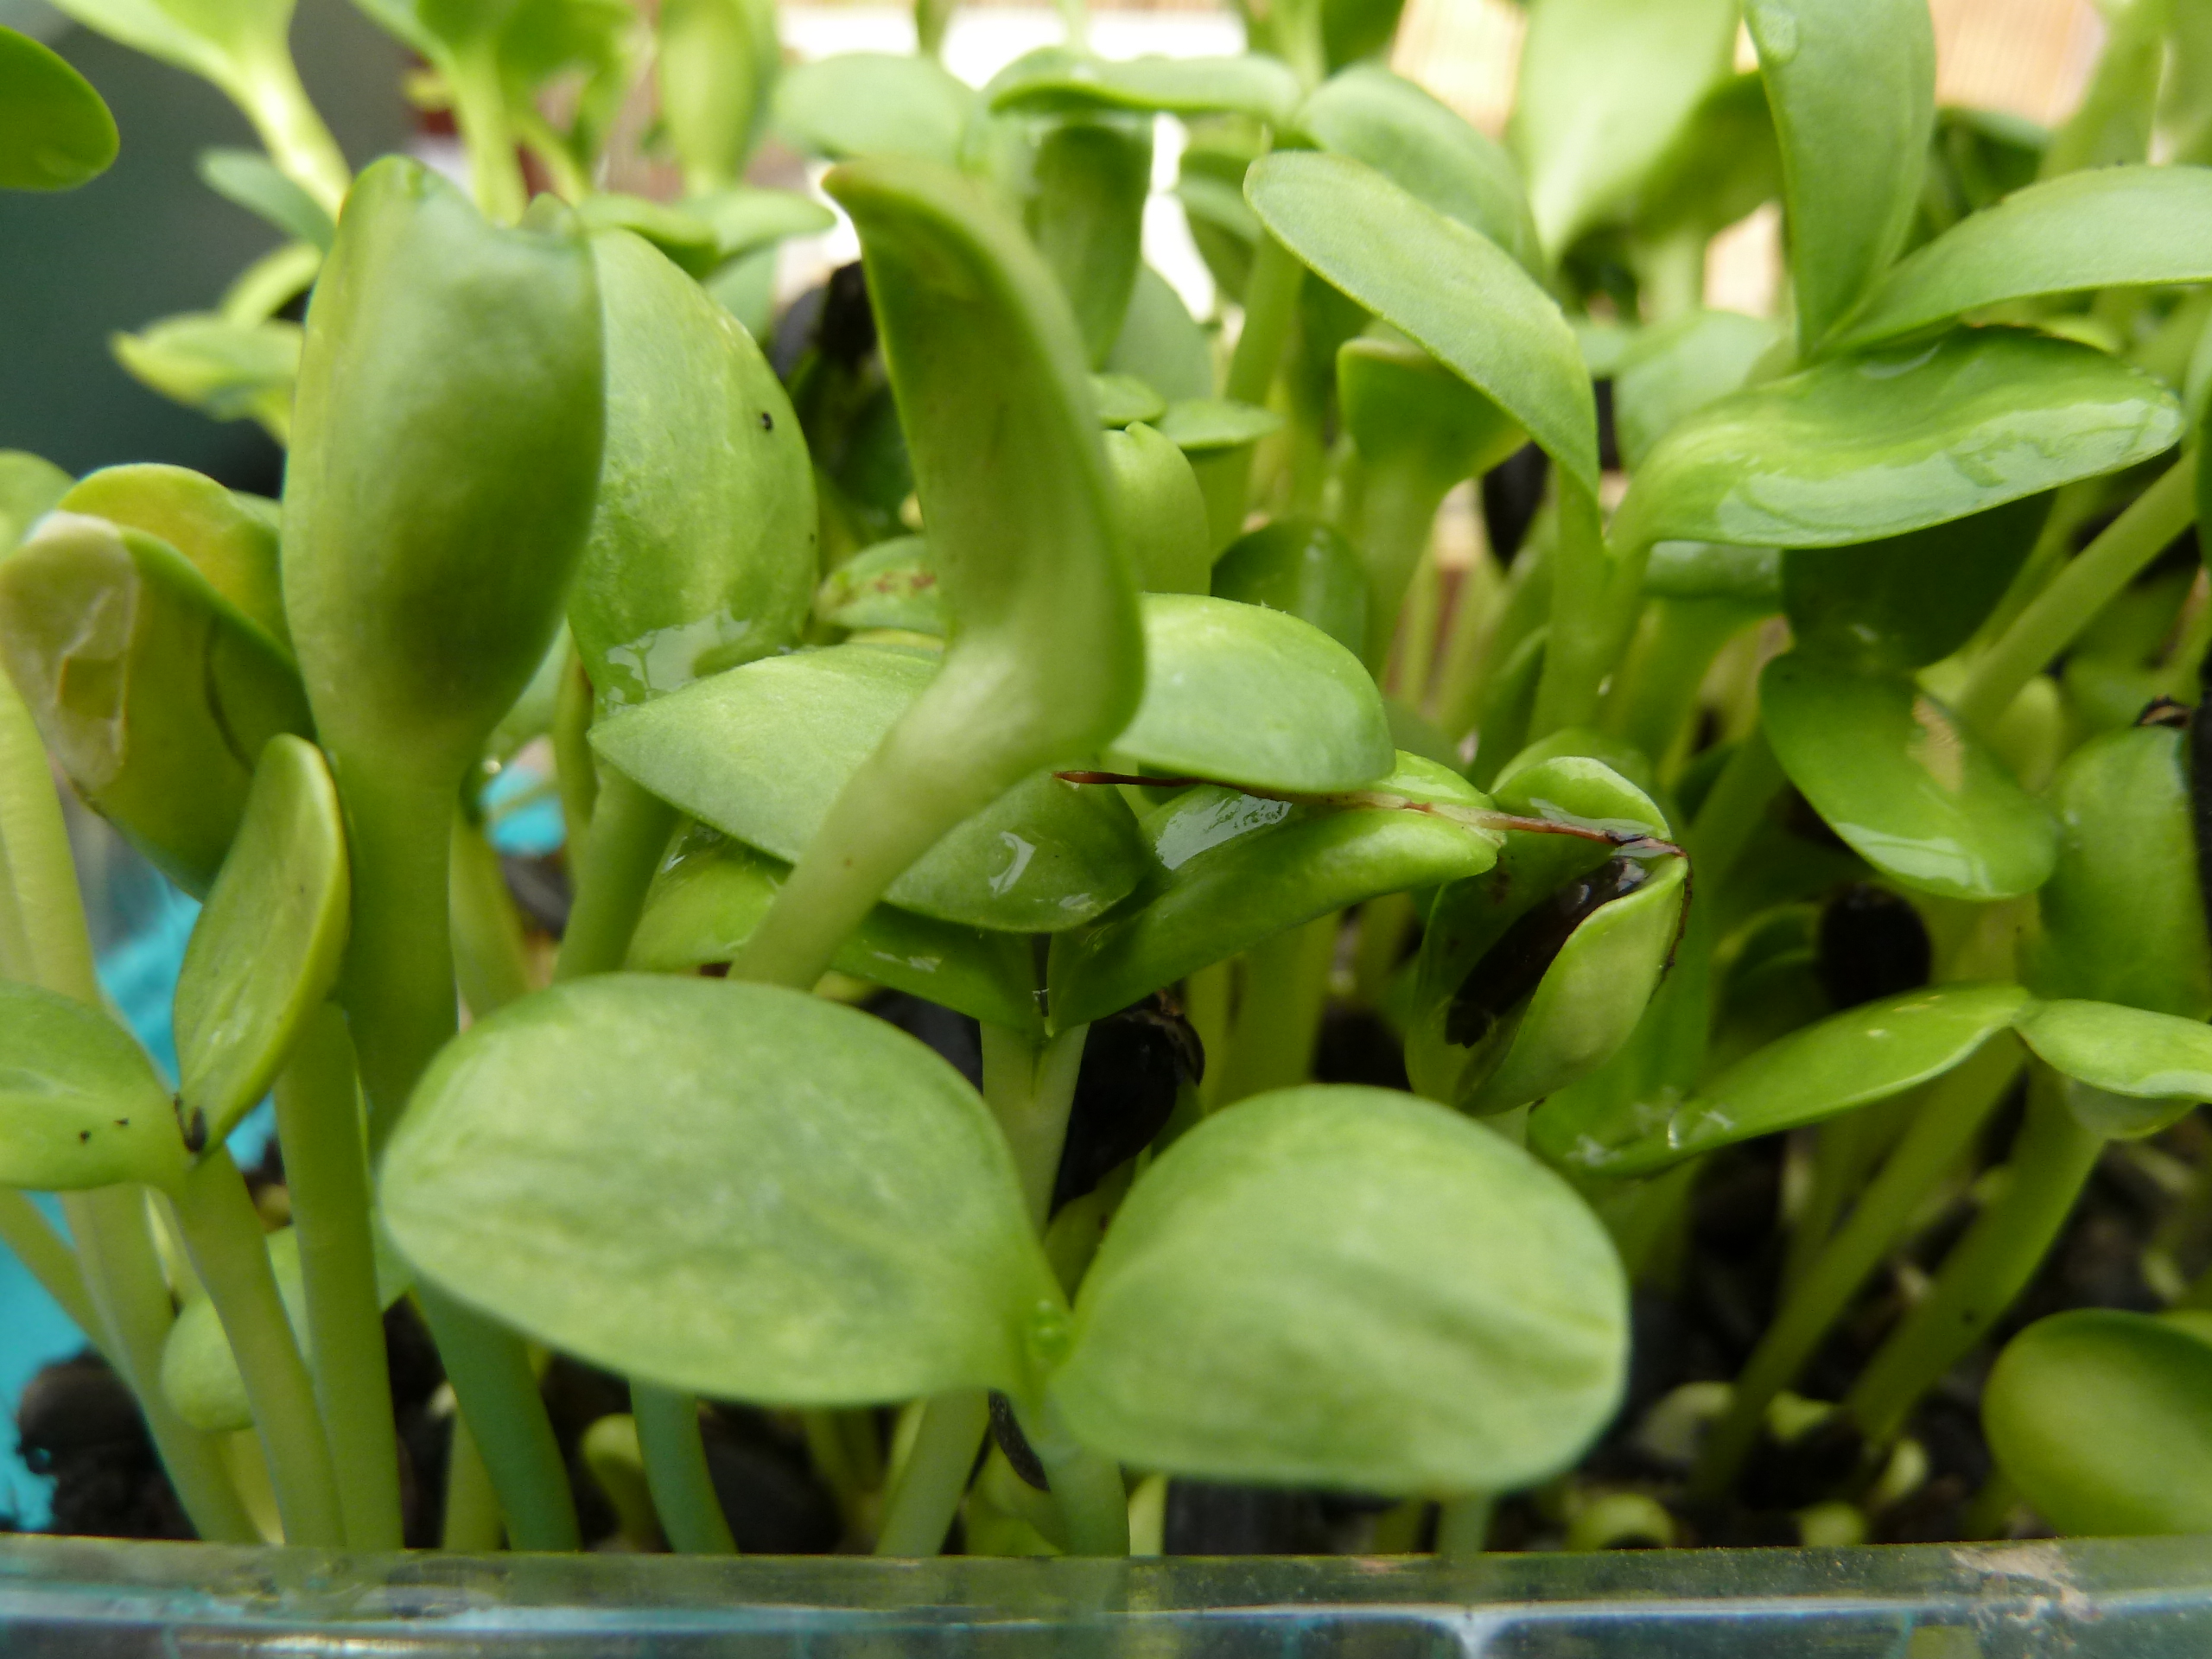
When growing sunflower greens do eat them before the true leaves appear - they're not nice after that (and mine end up with the hens!)
Sow little and often - you don't want gluts! As previously mentioned adopt the twice a week routine (I do Wednesday and Sunday) and you'll be fine.
After a cut - you'll notice others springing up after the main cut. This is your second wave, if you like. This is particularly evident with sunflower greens.

- Rocket goes easily and quickly from seed
Remember NOT EVERY bean and seed is safe to grow and eat as sprouts or micros, even if we do eat them or their fruit at a later stage. If in doubt, Google it. Some to avoid include tomatoes, aubergine and red kidney beans to name but a few. I don't sprout soya beans - some folks do - I don't because they would still need lots of cooking before they could be used. Plus - it's very hard getting soya beans that are fresh enough to sprout.
Most of all - enjoy - you have a whole new world ahead of you!

- Microgreens - from left to right sunflower, spinach, carrot, Rambo radish and lettuce.

Tuesday, 13 May 2014
Microgreens - the ultimate food!
Following on from yesterday's sprouting lesson, today we'll look at microgreens. If you watch programmes like MasterChef you'll have seen them already - they're the lovely little colourful bits that get 'draped' over top dishes to give them the 'wow factor'.
Here's an example of microgreens used on a home grown salad (more on that later!)
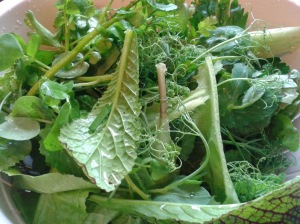
- The salad before adding microgreens
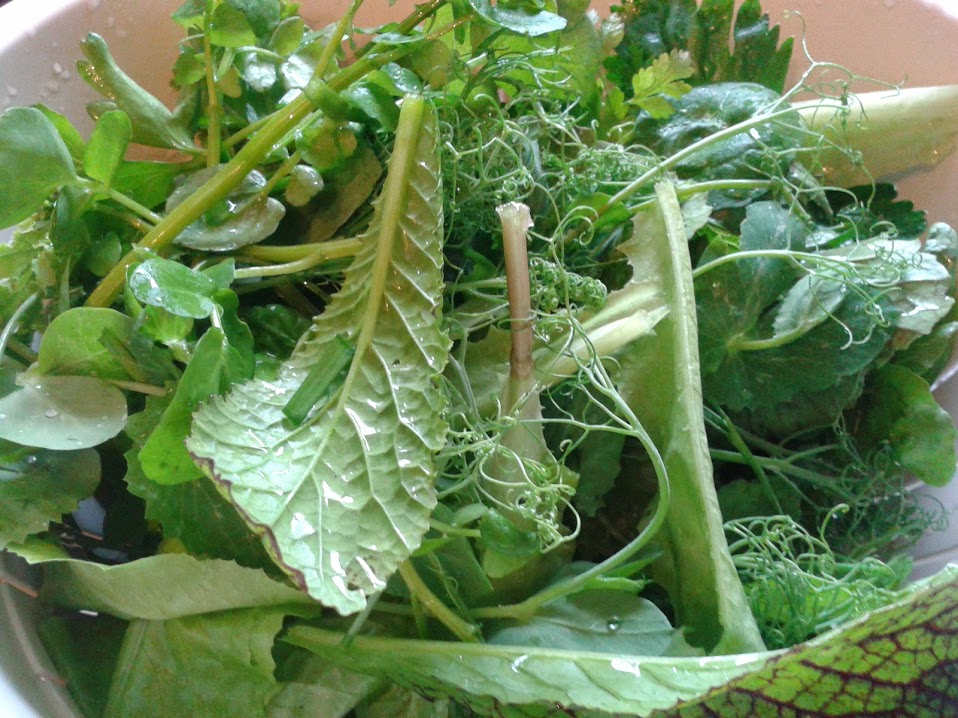

- The same salad after adding microgreens

You can see instantly the wow factor in action! However there is much, MUCH more to microgreens that prettying up a plate of food. They are oh so good for you!
So what exactly is a microgreen?
You start with a sprout and you grow it to the next level of its development - you let it grow leaves :-) The leaves contain chlorophyll - liquid sunshine! We all know how good wheatgrass is for us - well part of the reason for that is the chlorophyll.
Some of the best microgreens are; sunflower, beets, radish, broccoli, watercress, cress, rocket, spinach, lettuce, herbs i.e. basil, coriander (cilantro), kale, cabbage (red looks fantastic) carrot tops (you can buy seeds especially for this here; http://www.nickys-nursery.co.uk/garden-shop/seeds/micro-greens/ ) I always grow my alfalfa and clover to micro stage - much better for you and far tastier! Pea shoots are a great example of micros too. They taste like the peas - so why wait? Micros are easier to grow too! Quinoa and Amaranth are great micros too and amaranth comes in a stunning red.
Beans and lentils work as sprouts but they tend to get bitter as they green up so I don't bother.
The biggest tip I can give you is buy organic. Heavens only knows what treated seeds have on them - I never use anything other than organic. If you were growing your carrots to full size there'd be time for any lurking chemicals to leave them but not with microgreens.
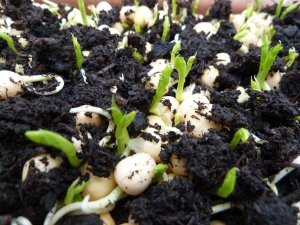
So let's look at actually growing them. I use small trays. Now here is recycling at its finest! You know the shallow trays you get mushrooms in etc from the supermarket? Store them - I use the ones that blueberries and strawberries come in too - they've already got drainage - so what's not to like? I wash them and reuse them too.
Just put about 1 cm of good quality ORGANIC compost in the tray and gently firm it down. Sprinkle your seeds on top and gently water. For tiny seeds like alfalfa I water form the bottom (stand the tray in shallow water until the top is dark and moist). For larger seeds like sunflowers I gently water from the top so the seeds are wet. A quick and easy way to do this is sprout the seeds in your jar for a day first then scatter them thinly over the compost. Keep them somewhere not too hot and shaded from sun and watch them sprout!
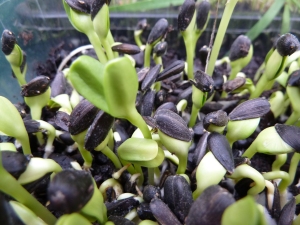
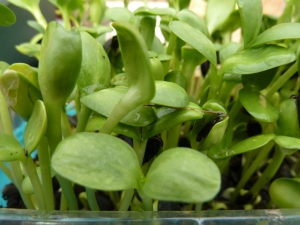
- Sunflowers greens just sprouting in organic compost

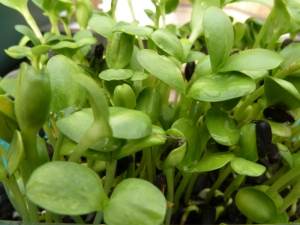
- A few days later....

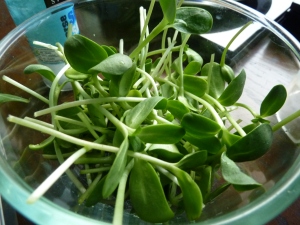
- Sunflower greens ready to eat!

To sprout or not to sprout?
As promised here I am with sprouting and micro green lessons ;-)
I've already mentioned how good they are for you (and will add more on that in future posts) and think about it - they are the ultimate fast food! I tend to work on a Wednesday - Sunday schedule. By starting new sprouts off twice a week you'll always have some available.
There are many ways of growing them but what I want to do is encourage you to do it the easiest and cheapest way possible. Yes, I do have The Farm (my EasyGreen automatic sprouter which I LOVE - see link below) but I still use jars etc. I have a sprouting jar which I find great for the bigger ones like mung sprouts - that's still my prefered way of growing them actually.
- Sprouting jar

The main thing is with jars they must be able to drain thoroughly so if you're using a jam jar it will need angling at 45 degrees. I find the jar method not so good for smaller sprouts such as alfalfa and clover and pity useless for mucilaginous seeds like linseed and cress.
There are several other sprouting kits available but I want to help you do it with minimal outlay. (If you want to look at more sprouters click here; http://www.ukjuicers.com/sprouters-and-seeds ) I have bought lots of stuff from this company and they're great! (My juicer also came from them but more on that another day :-) )
The secret to sprouting lies in the frequency of rinsing (depending on the seeds, this is normally 2-3 times a day. There are some seeds that need special attention and we'll cover those again). The other important thing is DO NOT overcrowd them in your jar. 1 tablespoon of mung beans may well look lost in your jar - but when they get going - they need that space. This is the biggest cause of failure! They will rot if they don't get good ventilation.
Best sprouts to grow?
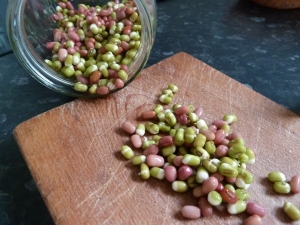
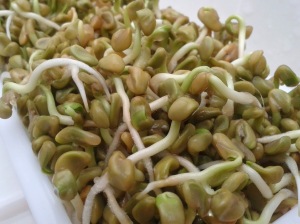
For ease and to get you started stick with easy ones; radish, broccoli, black eyed beans, cabbage, chick peas, mung and adzuki beans (these both sprout in the same time frame so can be grown together as in the picture above) and peas. Lentils are delicious too - but please, save your breath, don't try and sprout the red ones - they're hulled and split and will not sprout, ever! I love the Puy lentils - they taste like fresh peas once sprouted! Alfalfa and clover are best done in a tray (I'll cover that tomorrow with micro-greens)
Ones to avoid are soya beans, kidney beans and I tend to avoid any of the bigger beans due to the fact some aren't safe to eat uncooked. The largest bean I sprout is the black eyed bean (delicious!) I would also suggest skipping the mucilaginous seeds too as they can quickly become a slimy, smelly mess when done in a jar. (If I grow cress etc I do so in soil).
The Chinese recommend if you have a weak constitution (?) you should lightly cook your sprouts first before eating. I never do unless I'm throwing them in a stir-fry or curry. If you end up with lots - great! Pop them in a bag and freeze them for adding to cooked dishes. They are still really good for you!
So you have your jar, a piece of muslin or similar (plus elastic band to hold it in place) for the top of the jar, and you have your seeds/beans - what now?
Soak your seeds/beans overnight in water. Bear in mind this is the water they will swell with and start to sprout. Make sure it's good water! I use filtered. (Tap water is fine for rinsing). Lots of people use tap water per se so don't let it put you off - use what you've got and use it wisely. I use my rinse water for my houseplants as it does contain some nutrients that are now available to them. Try not to waste it - water is one of our most precious commodities! (OK, I'm off my soapbox now :-) )
Next morning, drain and rinse. Fill and rinse several times, swishing them around. Drain again and leave at the angle of 45 degrees. Repeat 3 x a day until you have your sprouts!
Simples ;-)
Like I said - the ultimate fast food!
Get the kids involved - they love seeing where their food comes from and it teaches them about life. Sprouts are naturally sweet which is why kids go for them and if you pack some in a lunchbox - they'll stay fresh until they eat them.
Some tips;
Don't leave them in a sunny window - they'll fry - remember they're babies and are at a delicate stage of their development! If you want them to green up (some are better, some are not!) put them in a spot which receives bright but filtered light.
Don't worry about getting all the hulls out that come off them - they're fiber!
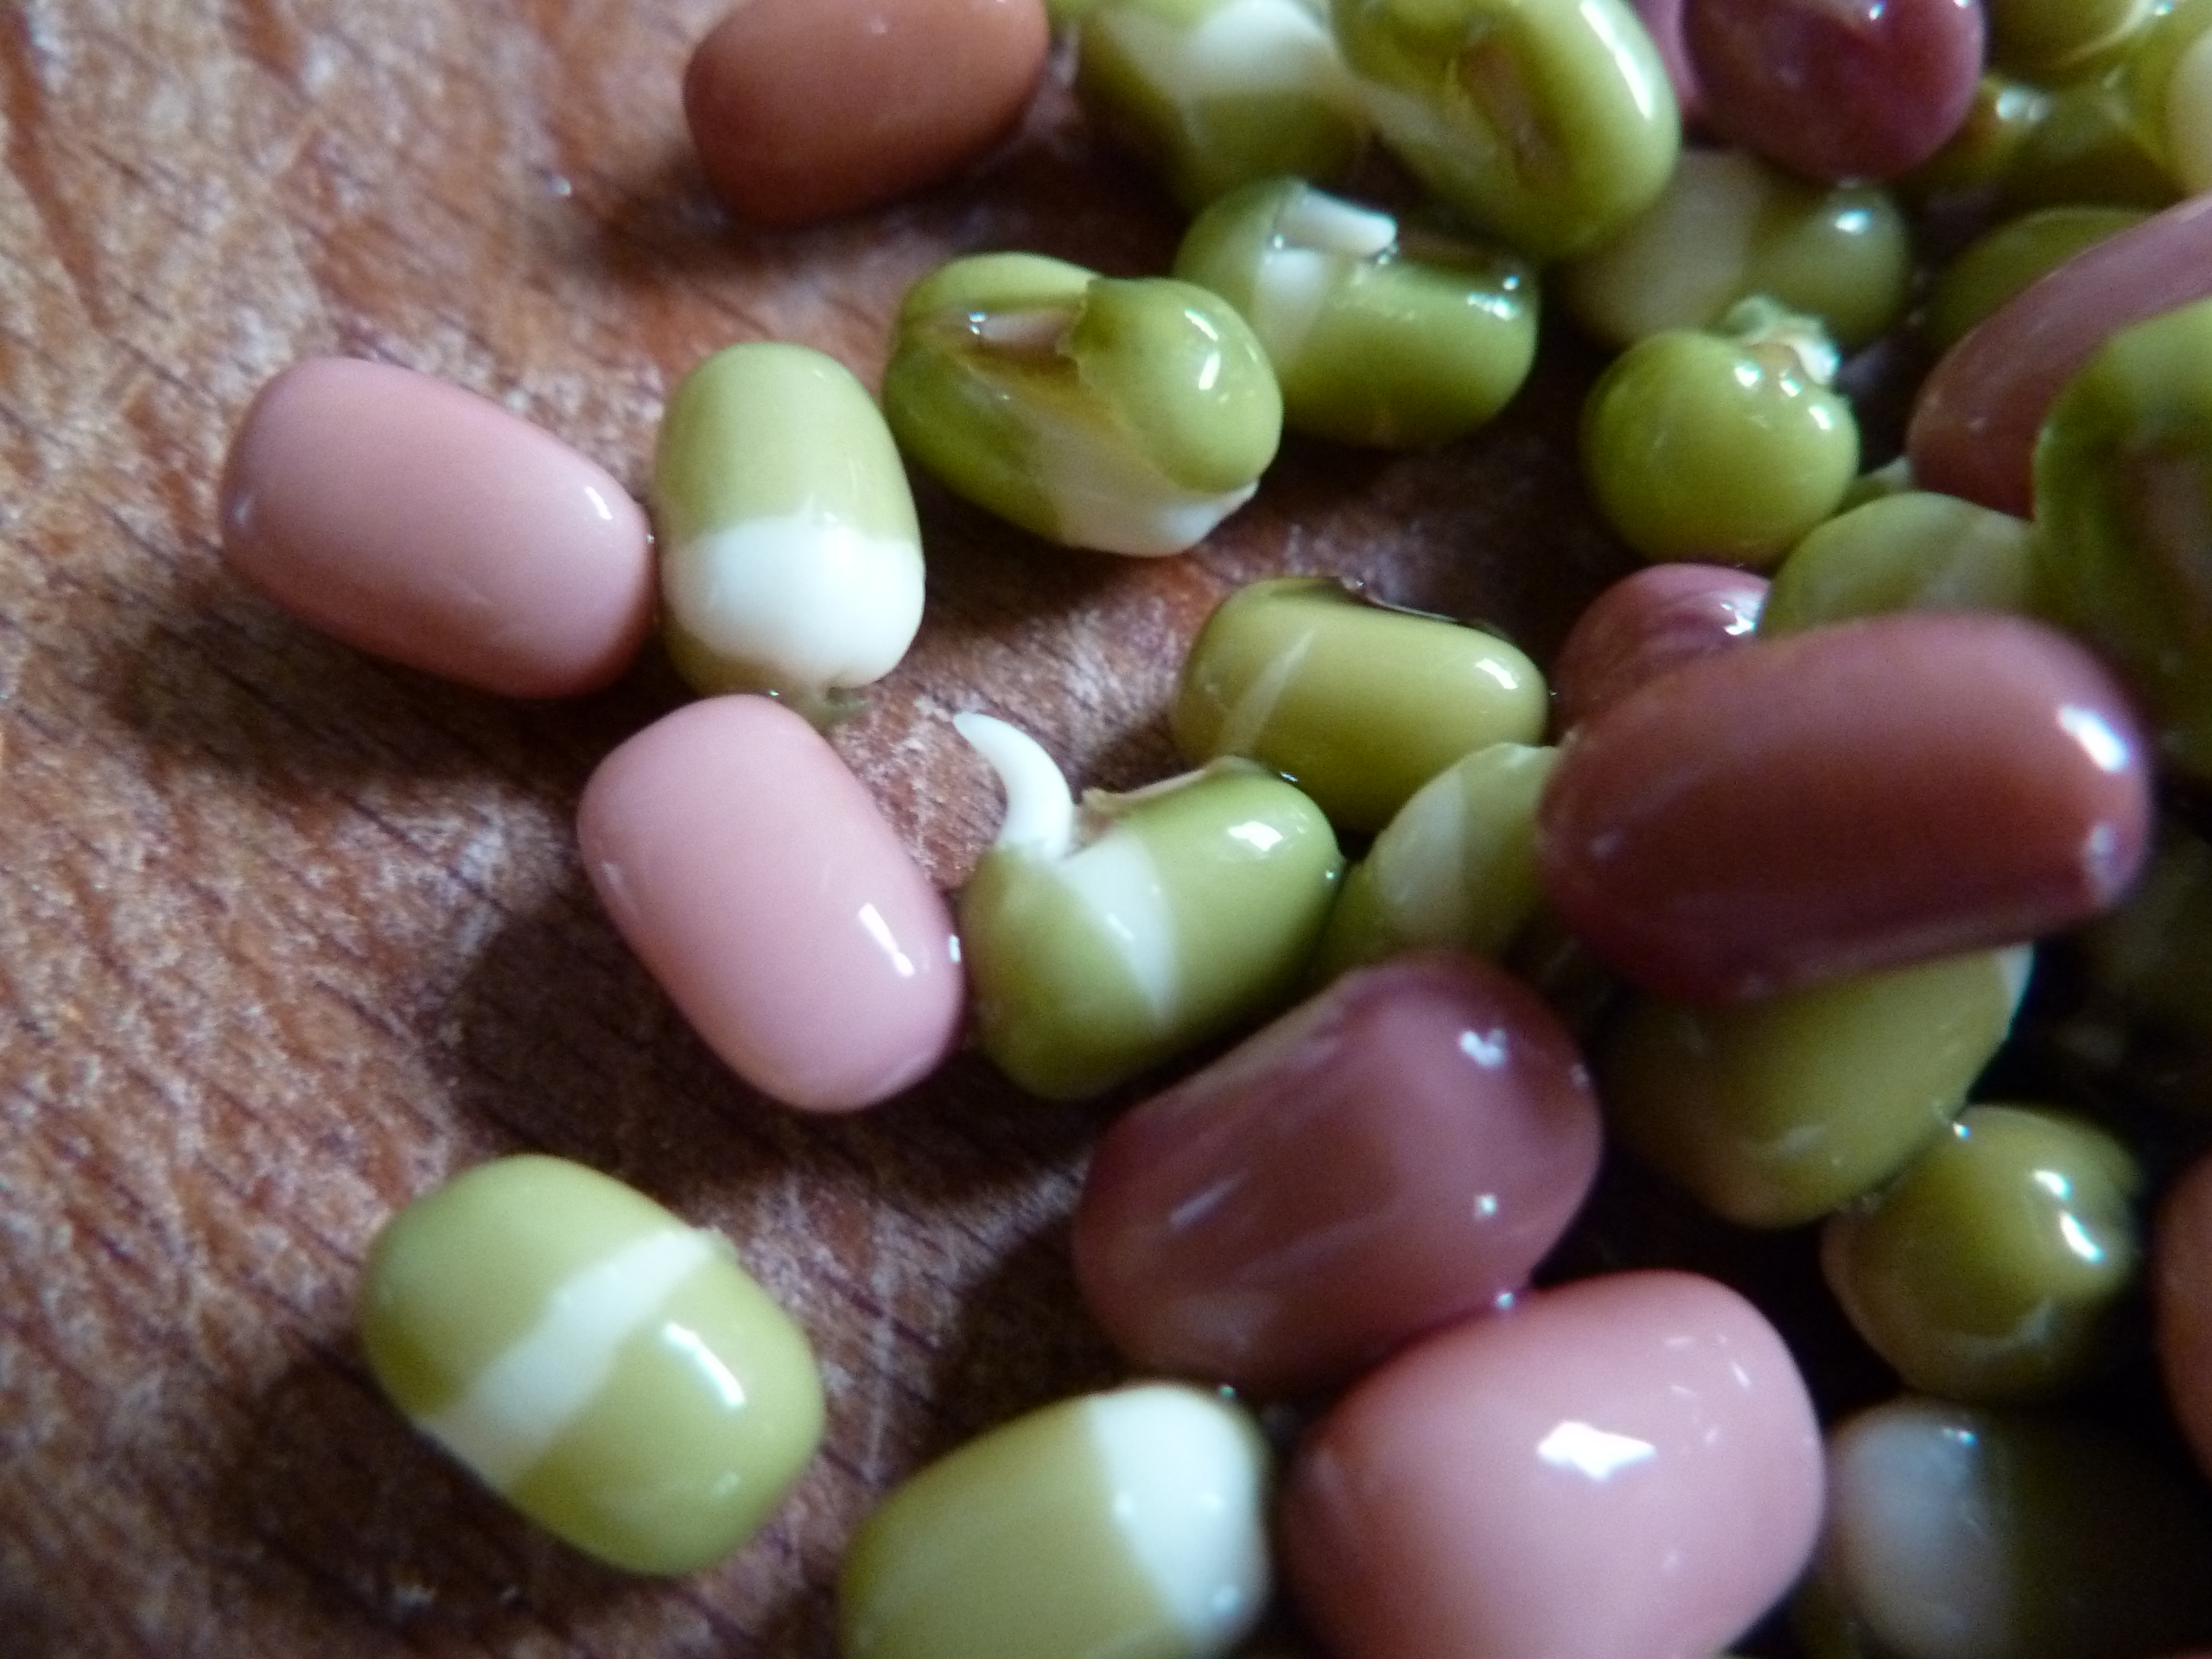
Buy organic. Don't use normal seeds from a garden centre etc (unless marked as sprouting seeds). Remember you are what you eat so you want the best. A decent sized bag of green peas for sprouting will last you ages! (Have a look here; http://www.skysprouts.co.uk/ )
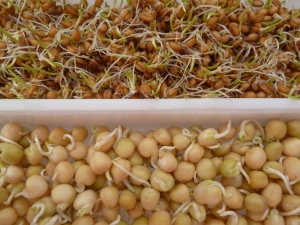
- Wheat sprouts (top) & green peas (bottom)

Tomorrow, we'll look at microgreens - this post was longer than I expected!!
The Simple Green Kitchen has it's public launch!
Well, The Simple Green Kitchen has it's public launch on Friday July 25th at Prestatyn Flower Show. I will be there giving a talk on 'Cultivating Herbs in Small Spaces'. I will have herbs with me - especially some of the more unusual ones; after all everyone's seen parsley already! I am also the herb judge for the show.If you want to pop along, I'm on at 2.30pm after the Mayor opens the show. I believe they are offering refreshments and the talk is free to join. I think the organiser, Ann Williams, needs to know so if you'd like to be there - she can be contacted via Bonne Amie on Prestatyn High Street.
It should be good folks! Come along and join in!
It should be good folks! Come along and join in!
Friday, 9 May 2014
Tofu - love it or hate it....?
I used to loathe tofu. No matter what I did with it I just couldn't get on with it at all. Until I read what I was doing wrong! Seems I should have been pressing the water out of it and I wasn't - well, not properly anyway.
Now I love the stuff and can't get enough of it. Take last night for example. I marinated some tofu in Yakitori sauce (available from Tesco for those in the UK) with the intention of cooking it today...........Ha! It never even made the pan (or today, for that matter!) I thought. 'I'll just try a cube uncooked first'. And that was it! History - me and my other half sat and chomped it all washed down with white wine.........made a really nice nibble actually :-)
I have decided, having discovered this book, that I will have a go at making my own. I used to buy a firm tofu with basil in it from a health food shop and even when I was a tofu hater, I could tolerate that one. I've not seen it for years (though confess I haven't looked that hard either).
So now I am a woman on a mission :-) I'll keep you posted!
This book looks awesome and I'm so looking forward to a new adventure.............
Sprouts and Microgreens
My favourite pastime! I love growing sprouts and micros - let's face it you can't get anything fresher anywhere. You don't even need a garden.
My favourites include;
Beetroot, carrot micros, fenugreek (which has 3 different flavours depending on what stage you use it), alfalfa, clover, red cabbage, sunflower greens, lettuce, spinach, wheat, broccoli (so very good for you!), basil (eat it at any stage and it's yummy!), mung and adzuki beans.
In fact, there aren't any I don't like!
They are packed with high quality protein which is far more accessible to the human body than the protein derived from flesh products. Did you know that the cells of chlorophyll are only one component different from haemoglobin? Green plant cells have magnesium ion at their nucleus and haemoglobin has iron. They are still not quite sure how it happens but it seems somehow the body can convert or swap the magnesium ion for iron and it creates new haemoglobin cells..........amazing, or what?
Sprouts and micros are also packed with nutrients and vitamins. And the big plus is you can grow them in the kitchen, pick them fresh and gruesome though this may sound - eat them whilst they are still alive!
Beans like mung are lovely to just snack on as they are. Liven up any salad and impress your guests by sprinkling some bright coloured micros on your main course just before you serve. All the top chefs and restaurants do that these days. Here's a few photos to whet your appetite (ha! No pun intended :-) )
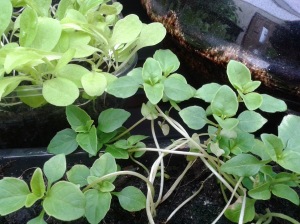
- Baby basil plants (with lettuce behind)

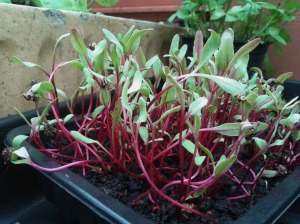
- Beetroot micros
- Fenugreek

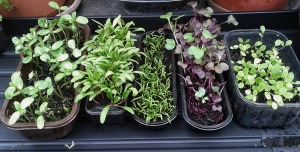
- Left to right; sunflowers greens, spinach, carrot, Rambo radish and lettuce


- Mung and Adzuki beans - do let them sprout further than this
- Top one for me - sunflower greens

- assorted sprouts in my EasyGreen sprouter. Affectionately known as The Farm!

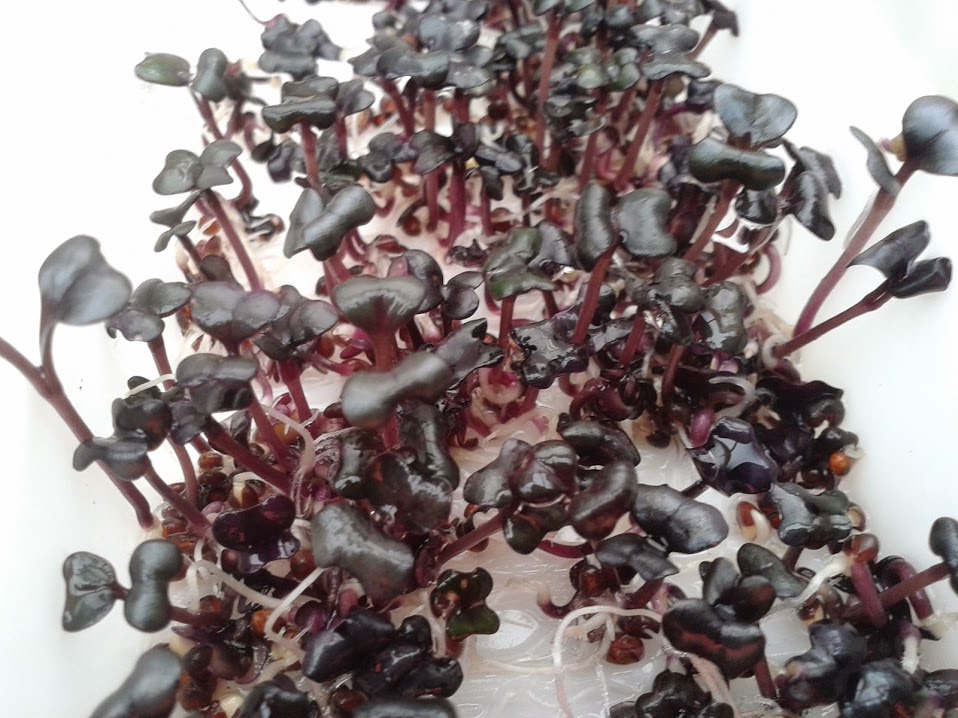
- Red cabbage sprouts
Tuesday, 4 March 2014
The Marvel of Mother Nature......
It never ceases to amaze me how incredible nature is! Now, I can't take the credit for this idea as I have seen a lot of posts/articles about doing this already online - but I thought I'd share it - plus photographic evidence!
I use a lot of celery and Pak Choi, lettuce etc and I read about getting more greens from your stumps! I think at some point (probably in infant school!) we have all had a go at growing a pineapple top? Ring any bells?
Well, did you know you can do it with Romaine lettuce, celery and Pak Choi too? (There are also others including lemon grass).
All you need to do, is keep the base of your celery (or whatever you're using), pop it in a small amount of water for a few days (do change the water daily!) When you see signs of roots forming, pot it up in good quality compost (don't put it in full sun - you'll fry it!) and 'Voila'! Free celery, lettuce, lemon grass or Pak Choi!
And here is the evidence.............
Monday, 3 March 2014
Scrumptious Nibbles!
I am constantly trying to come up with some quick but healthy snacks that I can just grab and go. (I'm a bit fed up of chomping celery sticks and carrot batons!) I made these this morning.....(and I will be keeping a stash of them in the fridge!)

250g mixed seeds (I used sunflower, pumpkin and a good handful of hemp)
50g of finely chopped cashew nuts (you can use your favourite or vary it each time)
6 sundried tomatoes very finely chopped (I used the ones in oil but do dab most the oil off them)
3-4 tbps finely chopped fresh herbs (I used parsley and chives because they're both still growing in the garden!)
A handful of fenugreek sprouts again, finely chopped (don't panic if you have no sprouts - just get your jars out for next time)
1-3 cloves of garlic finely chopped (to taste)
3 tbsp of oil (I used one of hemp and the rest, extra virgin olive oil)
Seasoning; you can use whatever you fancy. If you want a Mediterranean slant, add chopped olives and dried oregano and/or basil. If you fancy them spicy add a little cayenne pepper and garam masala (1tsp of GM - NOT cayenne - you'll only need a pinch of that!) See below for more suggestions....
A dash of lemon or lime juice
1 tsp of veggie bouillon powder
Salt and freshly ground black pepper (I actually use my homemade herb salt which I will share in a while when fresh herbs are abundant again)
A drop of cold water IF necessary
Finely grind the seeds in your mixer/blender. (Be careful you don't over do it - you'll end up with seed tahini instead!). Place in a bowl with the finely chopped herbs, cashews, and tomatoes. Mix well. Add the rest of the ingredients and shape into small balls. If the mixture crumbles you need that drop of cold water.
What I do then is chill them in the fridge as it helps them keep their shape. Serve with drinks, or flatbreads and fresh salad.
Variations on the theme; Don't you just love it when you come up with something that can be changed so much you don't ever need to eat it the same way twice? These can even be made into sweets (healthy ones!)
Instead of herbs, garlic, tomatoes and salt/pepper etc add chopped dried fruit (dates and apricots would be nice) grated coconut, cacao or even dip them in dark chocolate for a really indulgent treat :-) if they're not quite sweet enough (taste as you go along) you could add a little honey or agave nectar. I will use coconut oil instead of olive but you could use a nut oil (walnut) or a bland oil such as sunflower or grapeseed for the sweet version. If you still want to add herbs use one like sweet cicely (when available - mine's still snoozing!)
Above all, have fun - experiment and do please share what you come up with here...........I'd love to hear what you do!
I am sure there are many recipes online similar to this - if anyone has come up with the very same thing - apologies! I'm not stealing your thunder - I'm just sharing what I have made myself.
Monday, 3 February 2014
Hello again!
I know it's been some time since I've blogged on this site. However, I do have a very good reason - I've been busy elsewhere. (No kidding!)
Anyway I wanted to let you know normal service will be resumed shortly. I have been making plans, and this includes running workshops and talks etc. I already have my launch platform at our local flower show. (I'm one of the judges - the herb class being my specialty). I also judge the scarecrows but that's not really applicable here :-)
I have a lot to share as I have been experimenting....yes, you read that right! The results of which I will be sharing on here.
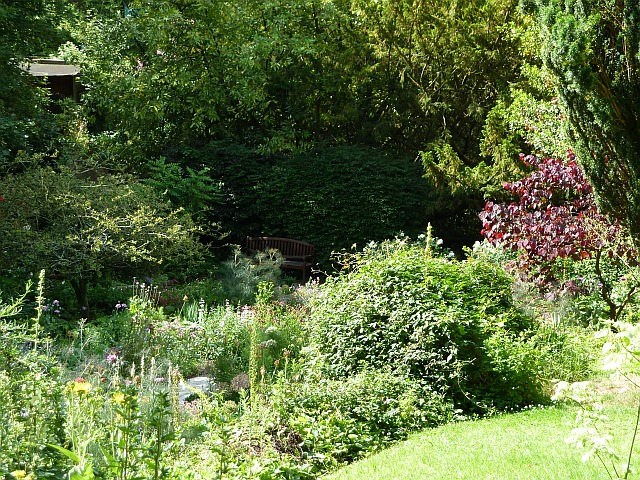
I'll leave you with a photo of something reminiscent of last summer.........
I grew the artichokes last year as part of my wildlife garden, assuming the butterflies and bees would appreciate their thistle like flowers (I left them to flower). They were barely touched, believe it or not! So this year, we're going to eat them!
See you anon.....

Anyway I wanted to let you know normal service will be resumed shortly. I have been making plans, and this includes running workshops and talks etc. I already have my launch platform at our local flower show. (I'm one of the judges - the herb class being my specialty). I also judge the scarecrows but that's not really applicable here :-)
I have a lot to share as I have been experimenting....yes, you read that right! The results of which I will be sharing on here.
I'll leave you with a photo of something reminiscent of last summer.........
I grew the artichokes last year as part of my wildlife garden, assuming the butterflies and bees would appreciate their thistle like flowers (I left them to flower). They were barely touched, believe it or not! So this year, we're going to eat them!
See you anon.....
Subscribe to:
Posts (Atom)